Create a System DSN for an Oracle Database
To create a DSN for the Oracle database you created, complete the following steps.
- On the 32-bit server where the Reveille server is installed, select Start >Control Panel >Administrative Tools. For 64-bit server systems, launch the 32-bit ODBC Data Source Administrator by running C:\Windows\SysWOW64\odbcad32.exe. The Control Panel appears.
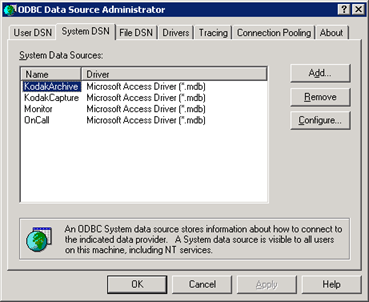
- Click the Add button. The Create New Data Source window appears.
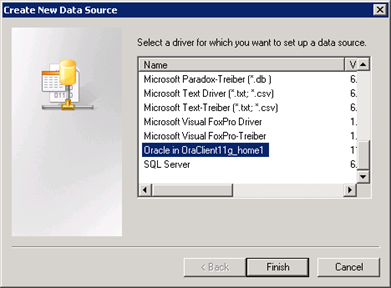
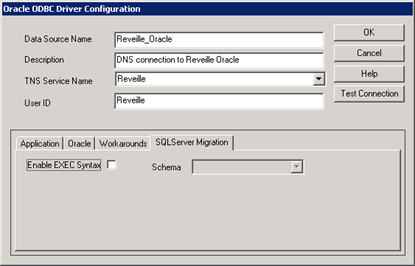
- Select Oracle in OraClient11g_home1 Driver and then click Finish. The Oracle ODBC Driver Configuration window appears.
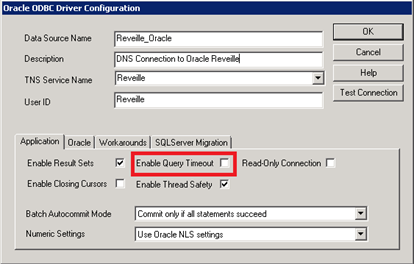
- From this page, complete the following steps:
- In the Data Source Name field, enter a name for the DSN to the Oracle database you created.
- In the Service Name field, select the TNS Service name that has been create for the Oracle database.
- In the User ID field, enter the user name that you created for the Oracle database. Check with your Oracle DBA for the correct user ID and password.
- Uncheck the Enable Query Timeout setting.
The rest of the settings leave with the default settings as shown below.
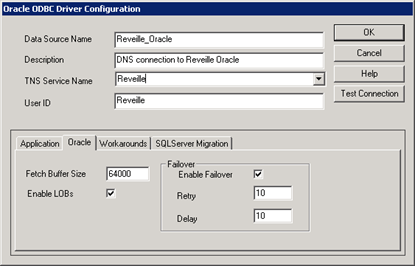
- Click the Oracle tab and confirm the settings are set as shown below.
- Click the SQL Server Migration tab and confirm the settings are set as shown below.
- Click the Test Connection button and enter the password for the Oracle user. Then, click OK.
- Click OK on the dialog window that indicates the connection was successful.
- If using a separate Reveille metrics database, create another ODBC DSN connection following previous steps.
Was this helpful?
Please tell us why:
Thank you.